Create Quotations
Create Quotations has been updated to improve quotation management and provide better control over customer details, quotation items, quantities, prices, taxes, and discounts. It also makes it easier to track quotation status, manage sales offers, and maintain accurate and organized records for better follow-up and decision-making.
Find Quotations
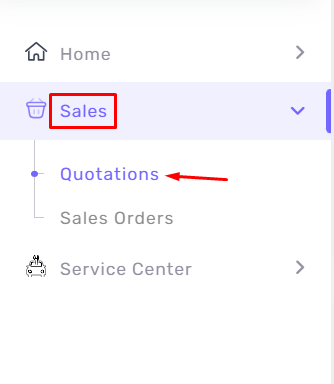
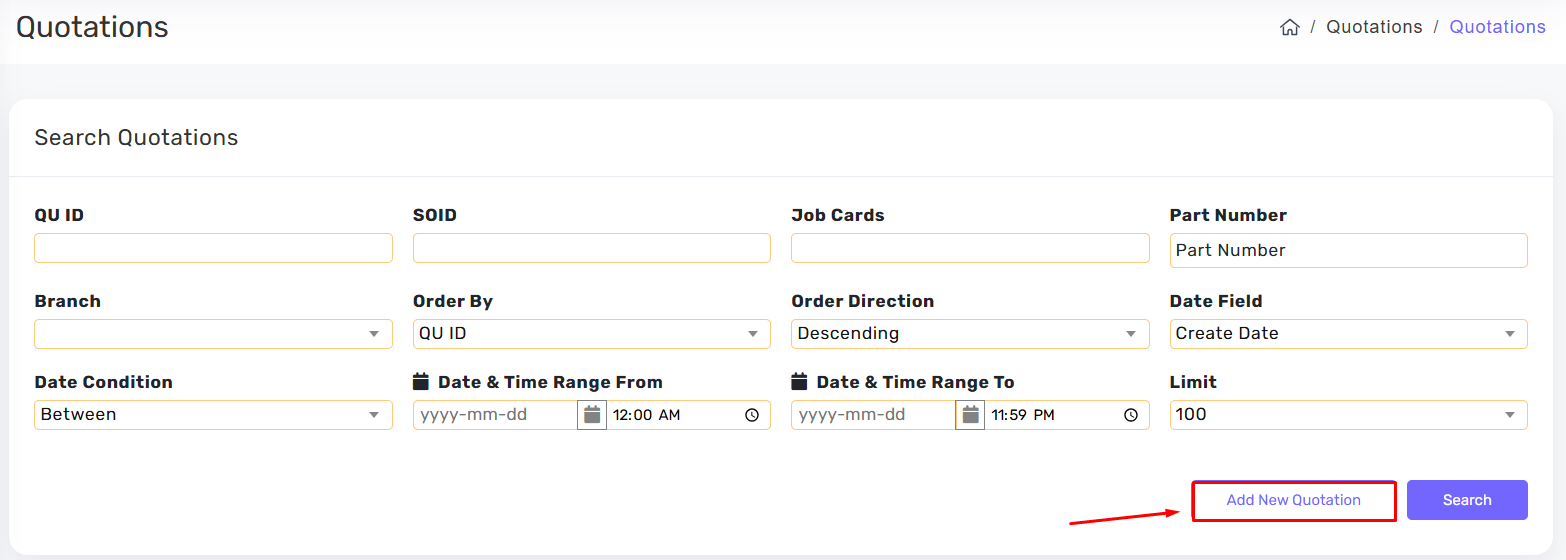
From the menu Sales → Quotations, you can search quotations, view quotation details, and create a new quotation
Add New Quotation
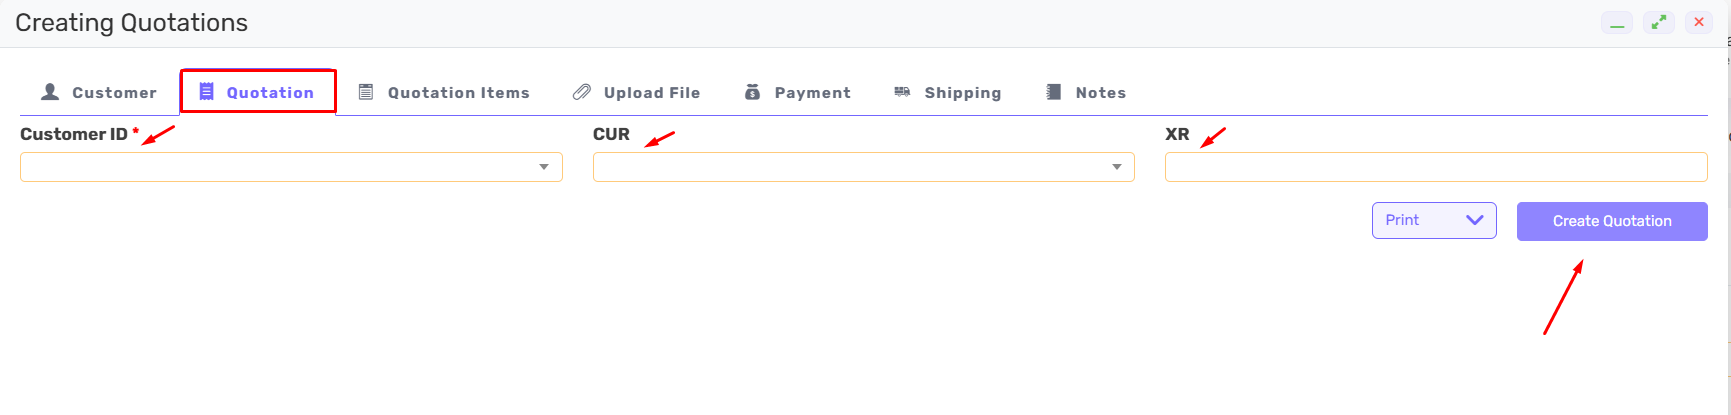
Click Add New Quotation to create a new quotation for a customer and enter the required quotation details.
Creating Quotation
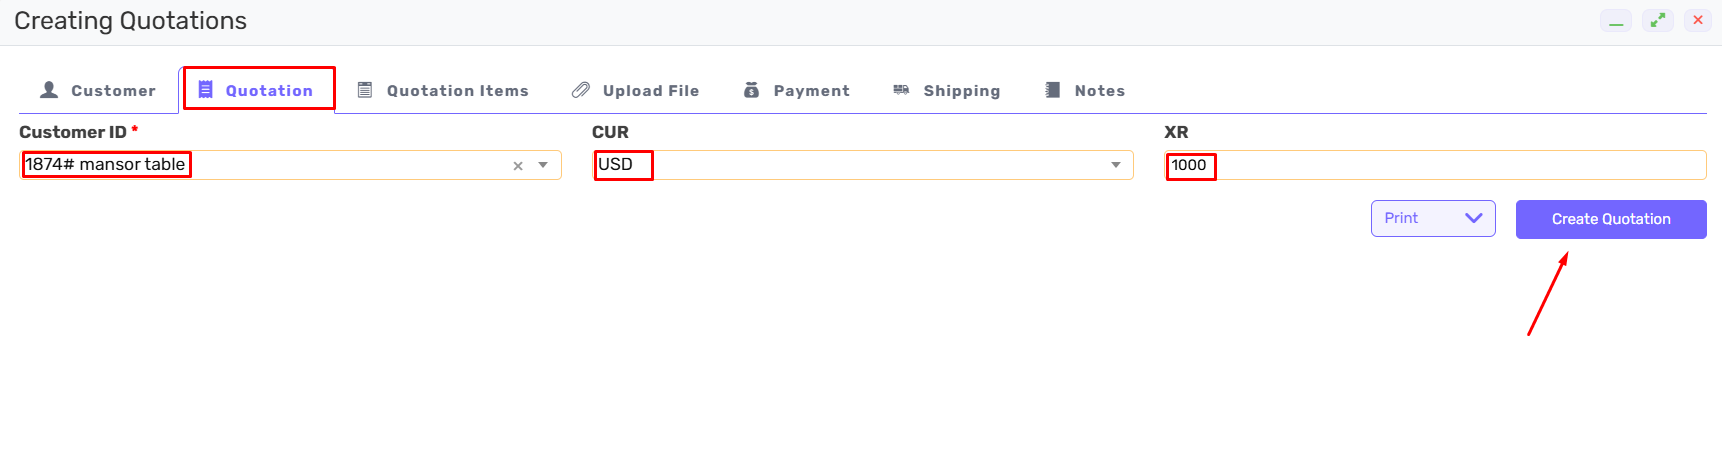
- Select Customer ID from the dropdown list to choose the customer you want to create the Sales Order for.
- Select CUR to choose the transaction currency, such as USD, EUR, or SAR.
- Enter XR (Exchange Rate) if the selected currency is different from the company’s main currency.
- Make sure all required fields marked with a red asterisk (*) are completed.
- Click Create Quotation to save the order and continue to the next step.
Example Creating Sales Order
Next Step :
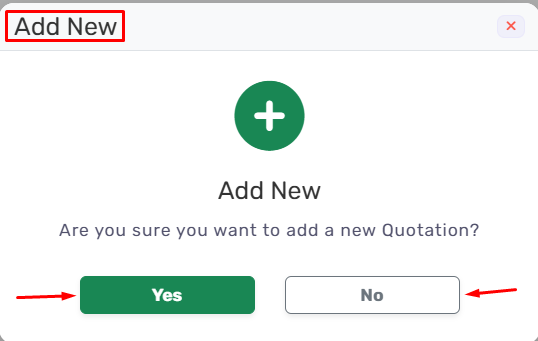
This is a confirmation message from the system.
It asks if you want to create a new Quotation.
Click Yes to continue.
Click No to cancel.
Quotation
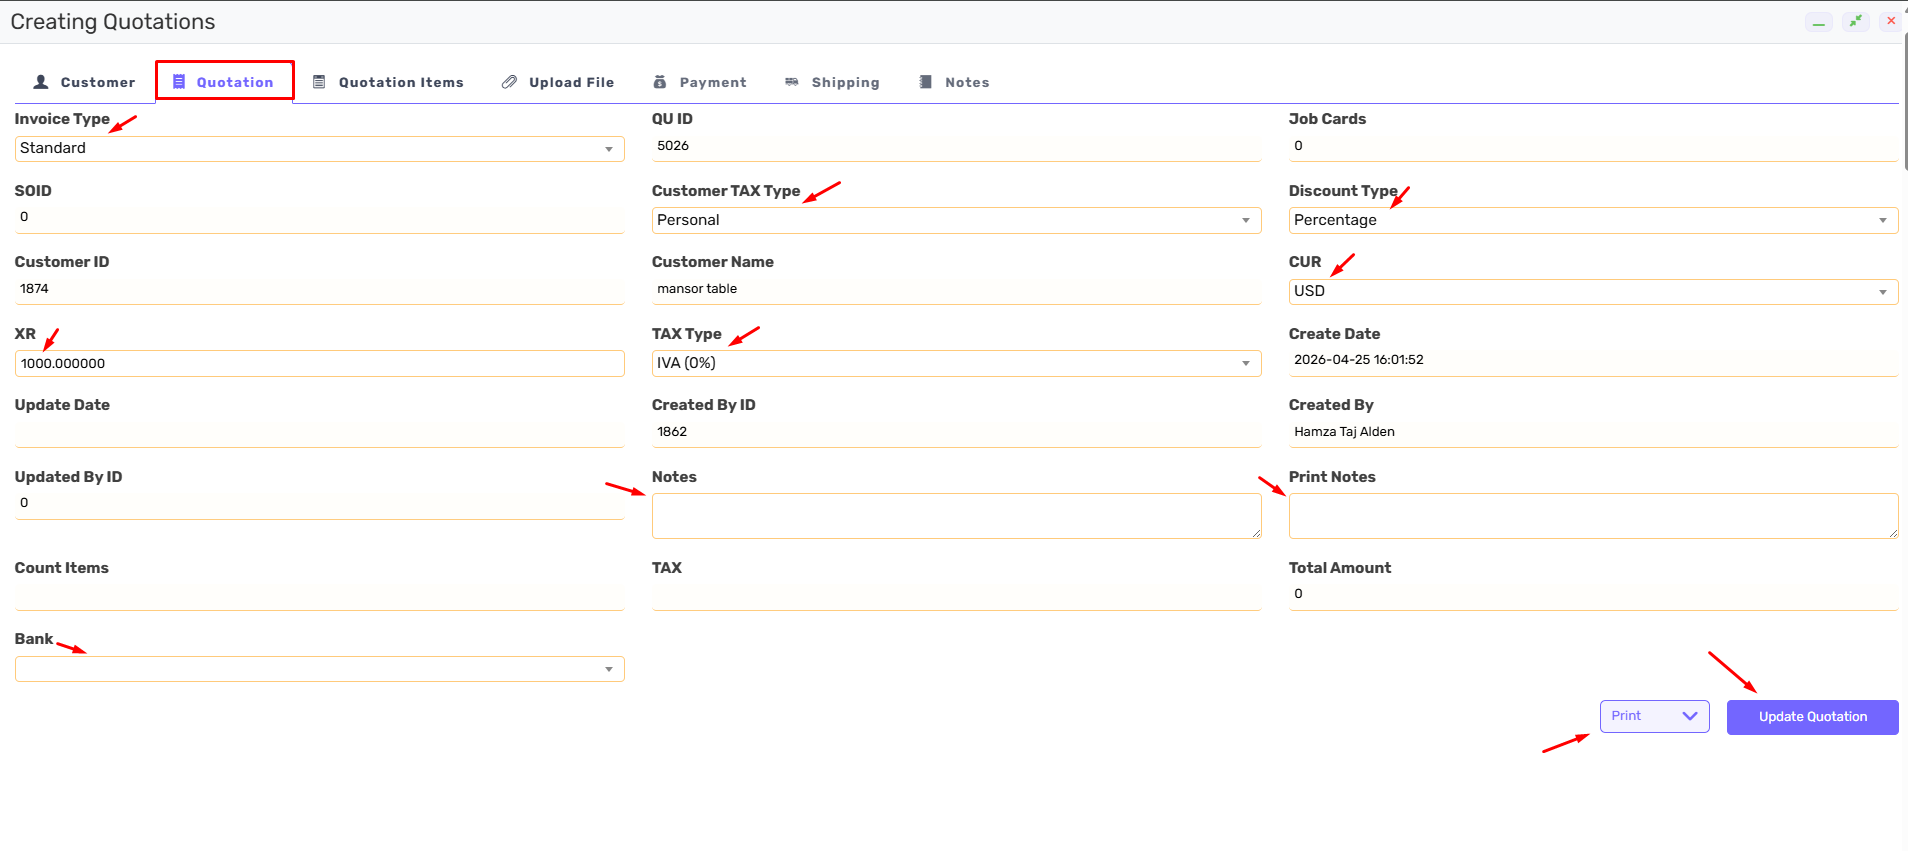
- Check Order Details to review the customer name, order number, and invoice type.
- Check Financials to review currency, exchange rate, discount, tax, and total amount.
- Check Administration & Sales to review salesman, branch, bank, and created by details.
- Check Logistics & Notes to review shipping terms and any notes.
- Check Approved to see if the order is approved or still pending.
- Click Print if you want to print or save a copy of the Sales Order.
- Update any required information if changes are needed.
- Click Update Sales Order to save all changes.
Quotation Items
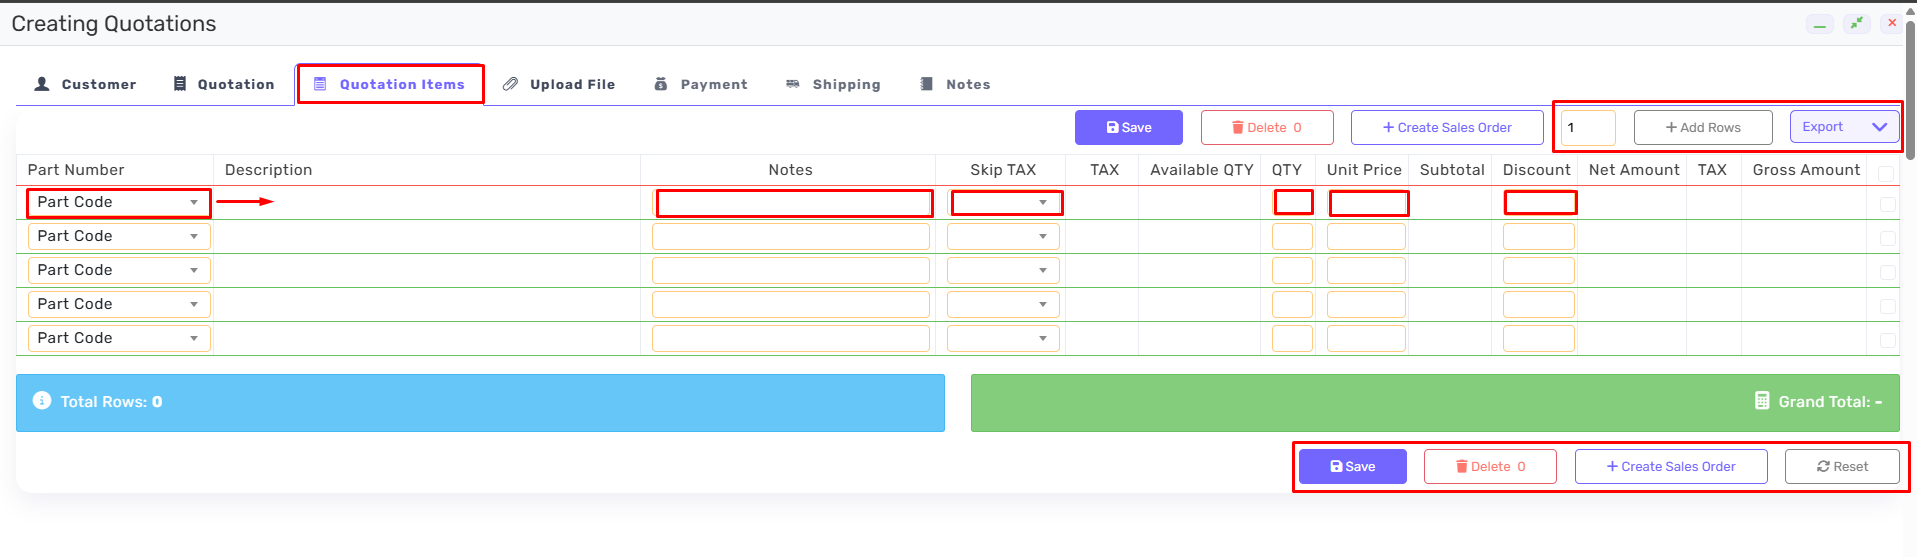
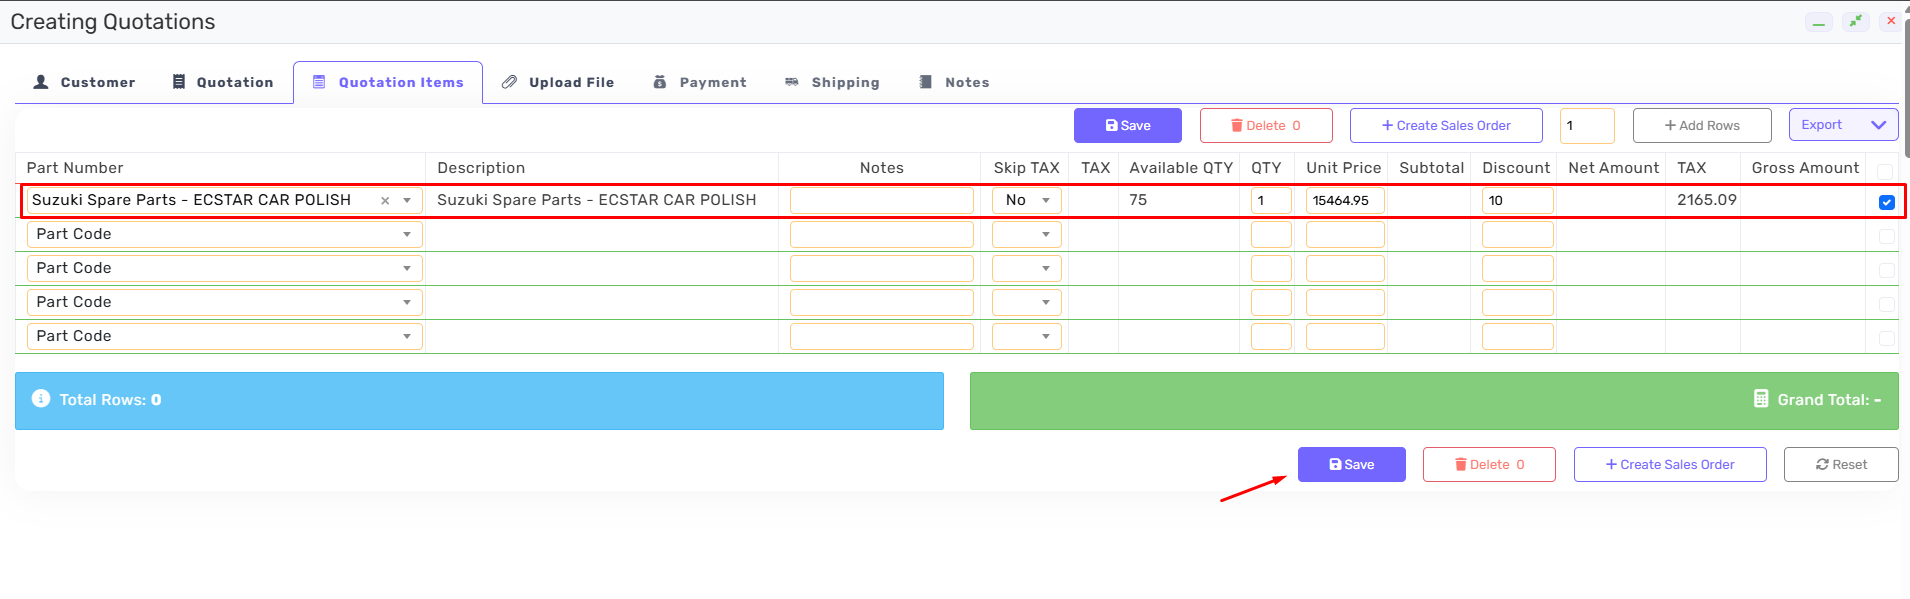
- Click Part Code / Part Number to choose the item you want to add. You can select it from the list or use the search icon to find the item.
- Enter Note to add any comments or additional details for the quotation.
- Enter Skip TAX if you want to exclude tax from this item.
- Enter Discount if you want to give a discount for that item.
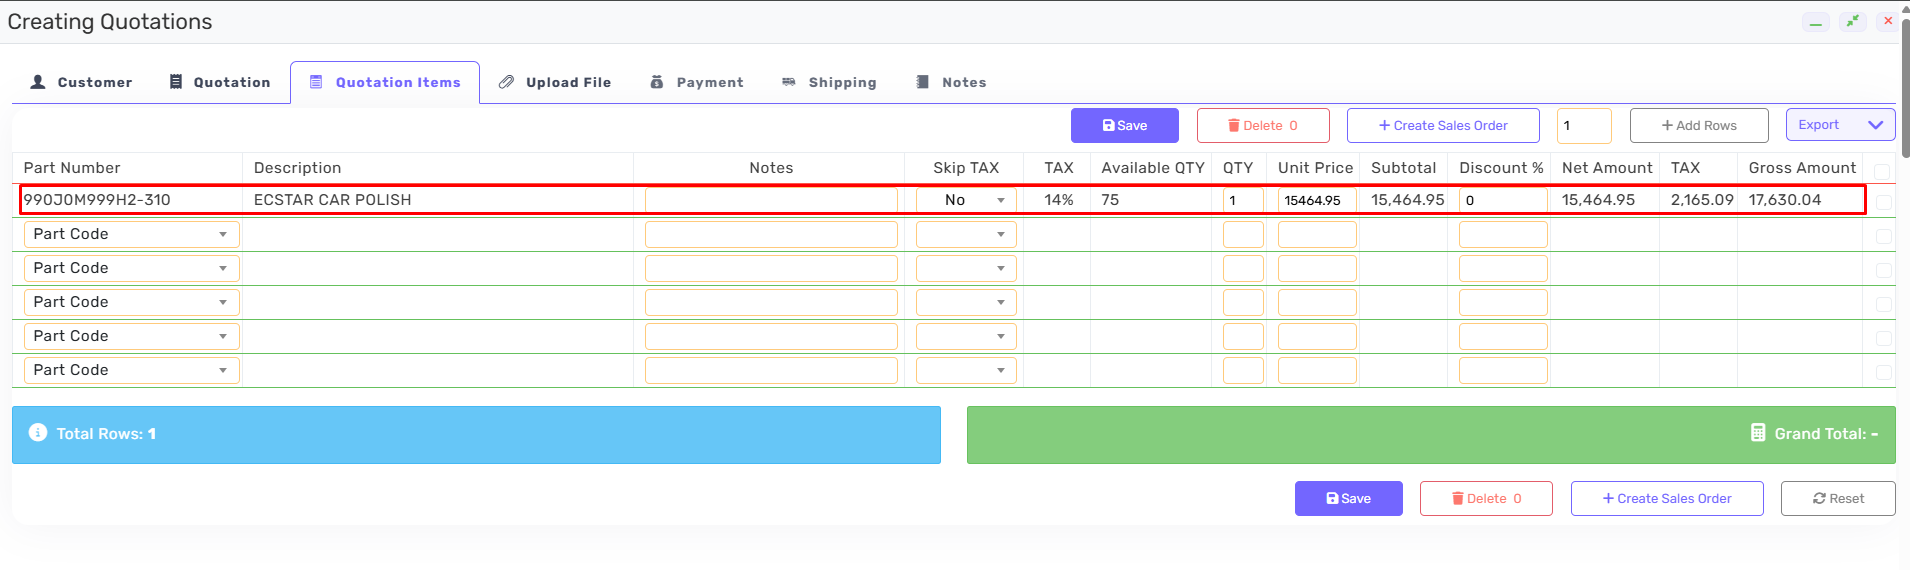
- The system will automatically calculate:
- Available QTY – Current stock quantity available
- Unit Price – Item price from the system
- Subtotal – Quantity × Unit Price
- Net Amount – Price after discount
- Tax – Tax amount for the item
- Gross Amount – Final total for that row
- Grand Total – Total amount for all items
- Click + Add Rows if you want to add more items.
- Click Save to save the entered items.
- Click Delete if you want to remove an item row.
- Click Create Sales Order to create a new sales order for the customer and enter the required order details.
- Export means taking the data you see on the screen and saving it into an external file (usually an Excel or PDF file or Copy ).
Example Quotation Items
Upload File
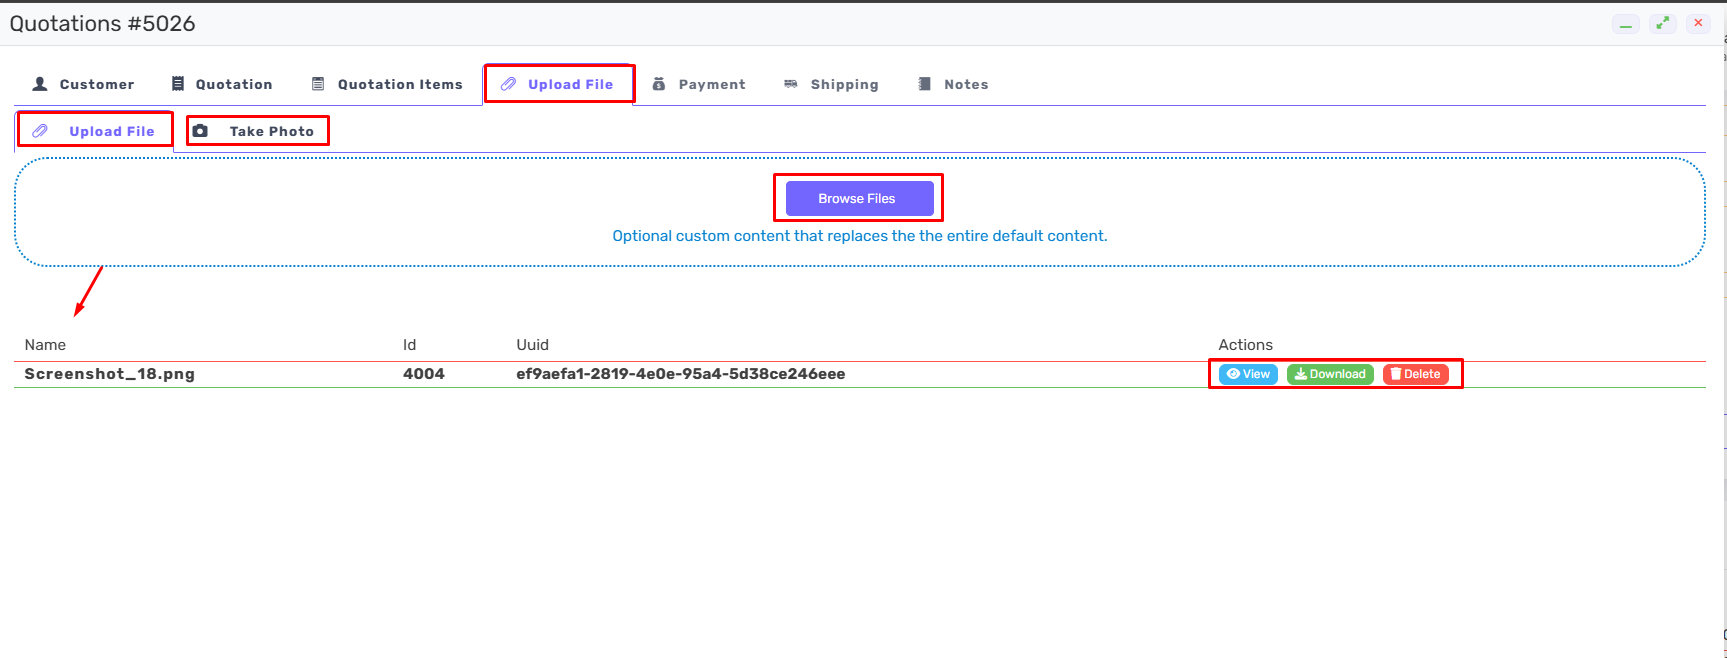
You have two options to add a new file
- You can click the “Upload File” tab
- use the “Take Photo” tab to capture an image using your device.
- Click the “Browse Files” button in the center of the screen. A window will open where you can select a document or image from your computer.
- Once the file is uploaded, it will appear in the list at the bottom.
- You will be able to see the file details such as:
Name (for example: steptwo.png), ID (the unique identification number), and UUID (the system-generated code for the file).
On the right side under Actions, you can manage the file using the available buttons:
- View to open and preview the file without downloading it.
- Download to save the file to your device.
- Delete to remove the file from the system.
Search Quotations
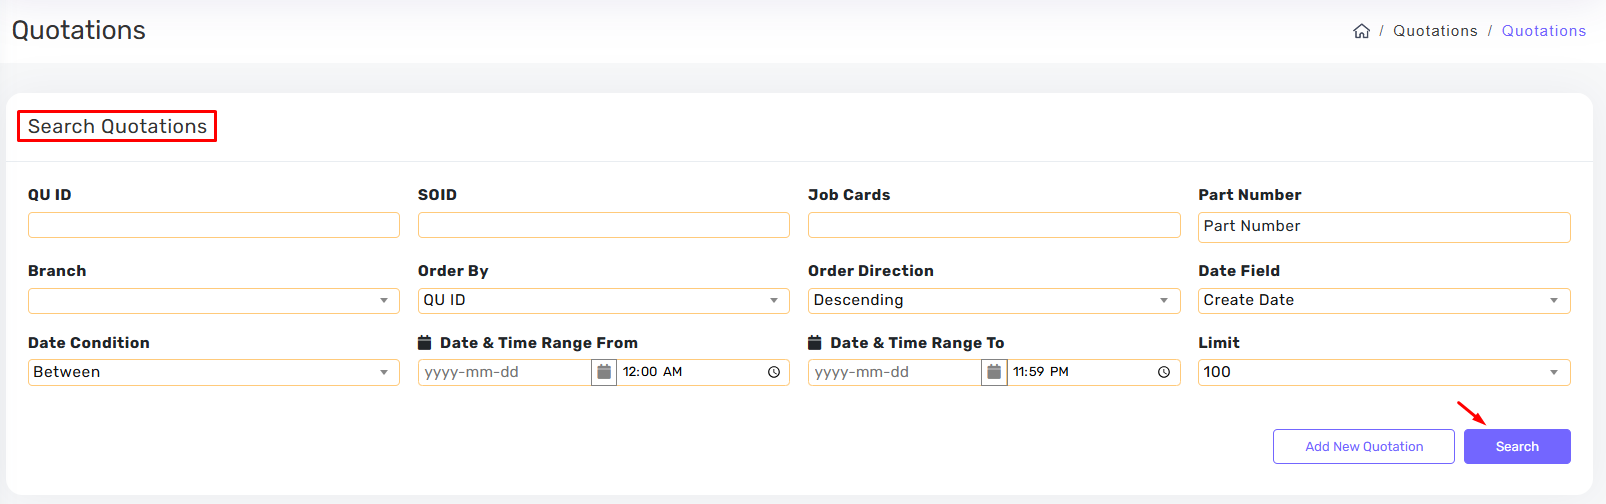
- Enter QU ID to search for a specific quotation. You can type the number directly or use the search icon to find it.
- Enter SO ID to search for a specific sales order. You can type the number directly or use the search icon to find it.
- Enter Job Cards to search for orders linked to a job card. You can type the number directly or use the search icon to find it.
- Enter Part Number to search for orders containing a specific item. You can type the item code directly or use the search icon to find it.
- Choose Branch to filter results by branch location
- Select Order By to choose how the results will be sorted.
- Select Order Direction to set sorting order (Ascending or Descending).
- Choose Date Field to select which date type to search by.
Enter Date Condition to set the date filter (Equal, Between, Before, After). - Enter Date & Time Range From and Date & Time Range To to search within a specific period.
- Enter Limit to define how many results you want to display.
- Click Search to show the matching results.
Search results
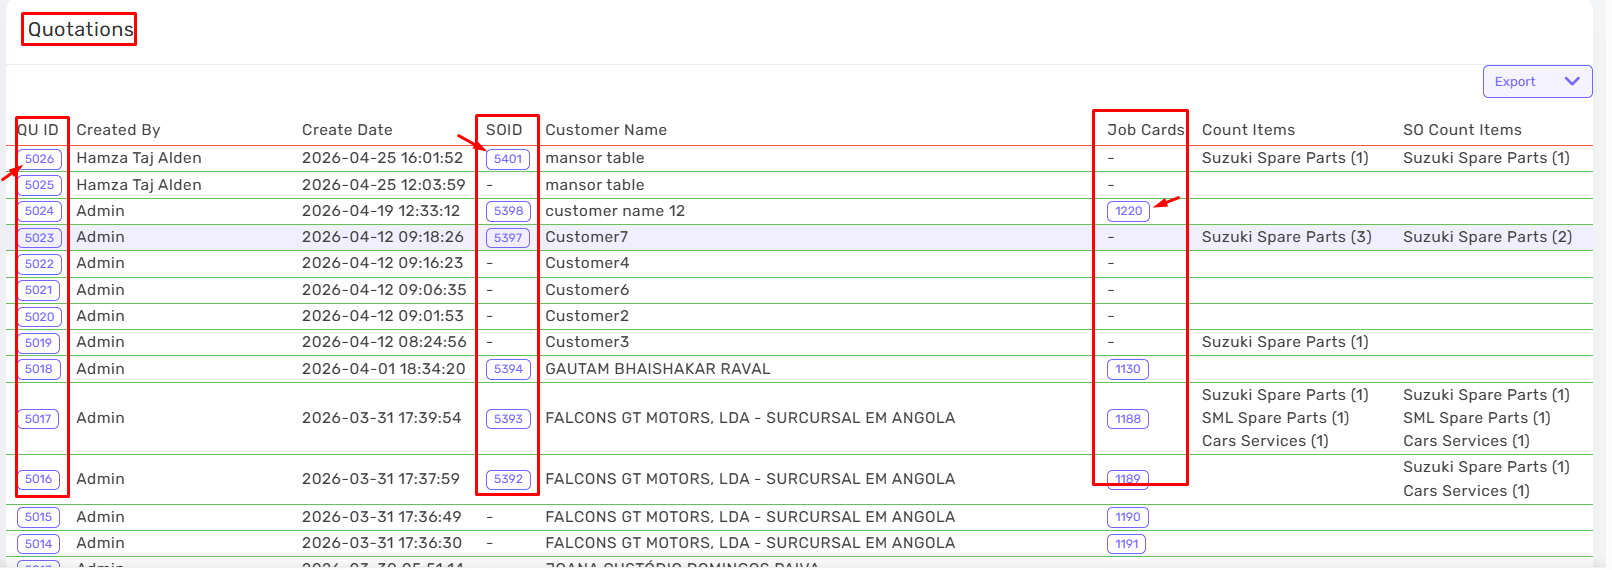
- Click QU ID to open or move to the quotation details.
- Click SO ID to open or move to the sales order details.
- Click Job Cards to open or move to the job card details.